Friday, October 4, 2013

Rustic Breakfast

Hi everyone,

I had to stop myself from hipster trolling and adding "artisanal" into the title of this post. Everything in NYC these days is "artisanal," which really just means "someone made this" in 99% of the word's occurrences. Whether the following breakfast dish is artisanal or not, I'll leave to your judgment. My job here is to focus on the food, and hopefully make you want to try it out for yourself. It's really hard and takes a lot of practice (HAH).

It's been a long time since I talked about breakfast on my blog, but given that I'm a hungry morning person who needs a good breakfast, I think it's about time. I will say though, that as much as I love breakfast and eating in the morning, it's less for me about the breakfast foods than the fact that I can eat as soon as I wake up. When I was little and growing up with an amazing Puerto Rican mom who made amazing Puerto Rican food, my favorite breakfast was often last night's leftovers: pork chops, arroz y habichuelas, spicy spaghetti with Italian sausage, and more. So today's breakfast meal is not for the faint of gut. It's hearty, filling, and will definitely stick to your ribs in a very non-Chobani-and-granola kind of way. And it couldn't be more delicious. So behold, breakfast bread bowls:


A savory, cheesey, meaty, bready, delicious combination. What more do you need? THIS is the breakfast of champions! It's been over a year since I these, and I can't believe I've withheld them from y'all for so long! This is a great thing to make if you're having people overnight, or for a brunch gathering. You can prep several of the ingredients ahead of time so that you can just assemble in the morning--like a choose-your-own-adventure.

My college roommate and fellow eating enthusiast made this when we were going through the crazy week that was graduation. The dining halls were closed, and we decided to treat ourselves, so to speak. And what better way than this breakfast? (It was too early for wine.)

So, we took the T down to to the local Shaw's and picked up a few things the night before. You can use whatever you'd like in these bread bowls that you think will go well with bread and cheese and egg. So, EVERYTHING.

We chose:

2 small soup bowl bread rolls (they're roughly 6" in diameter)
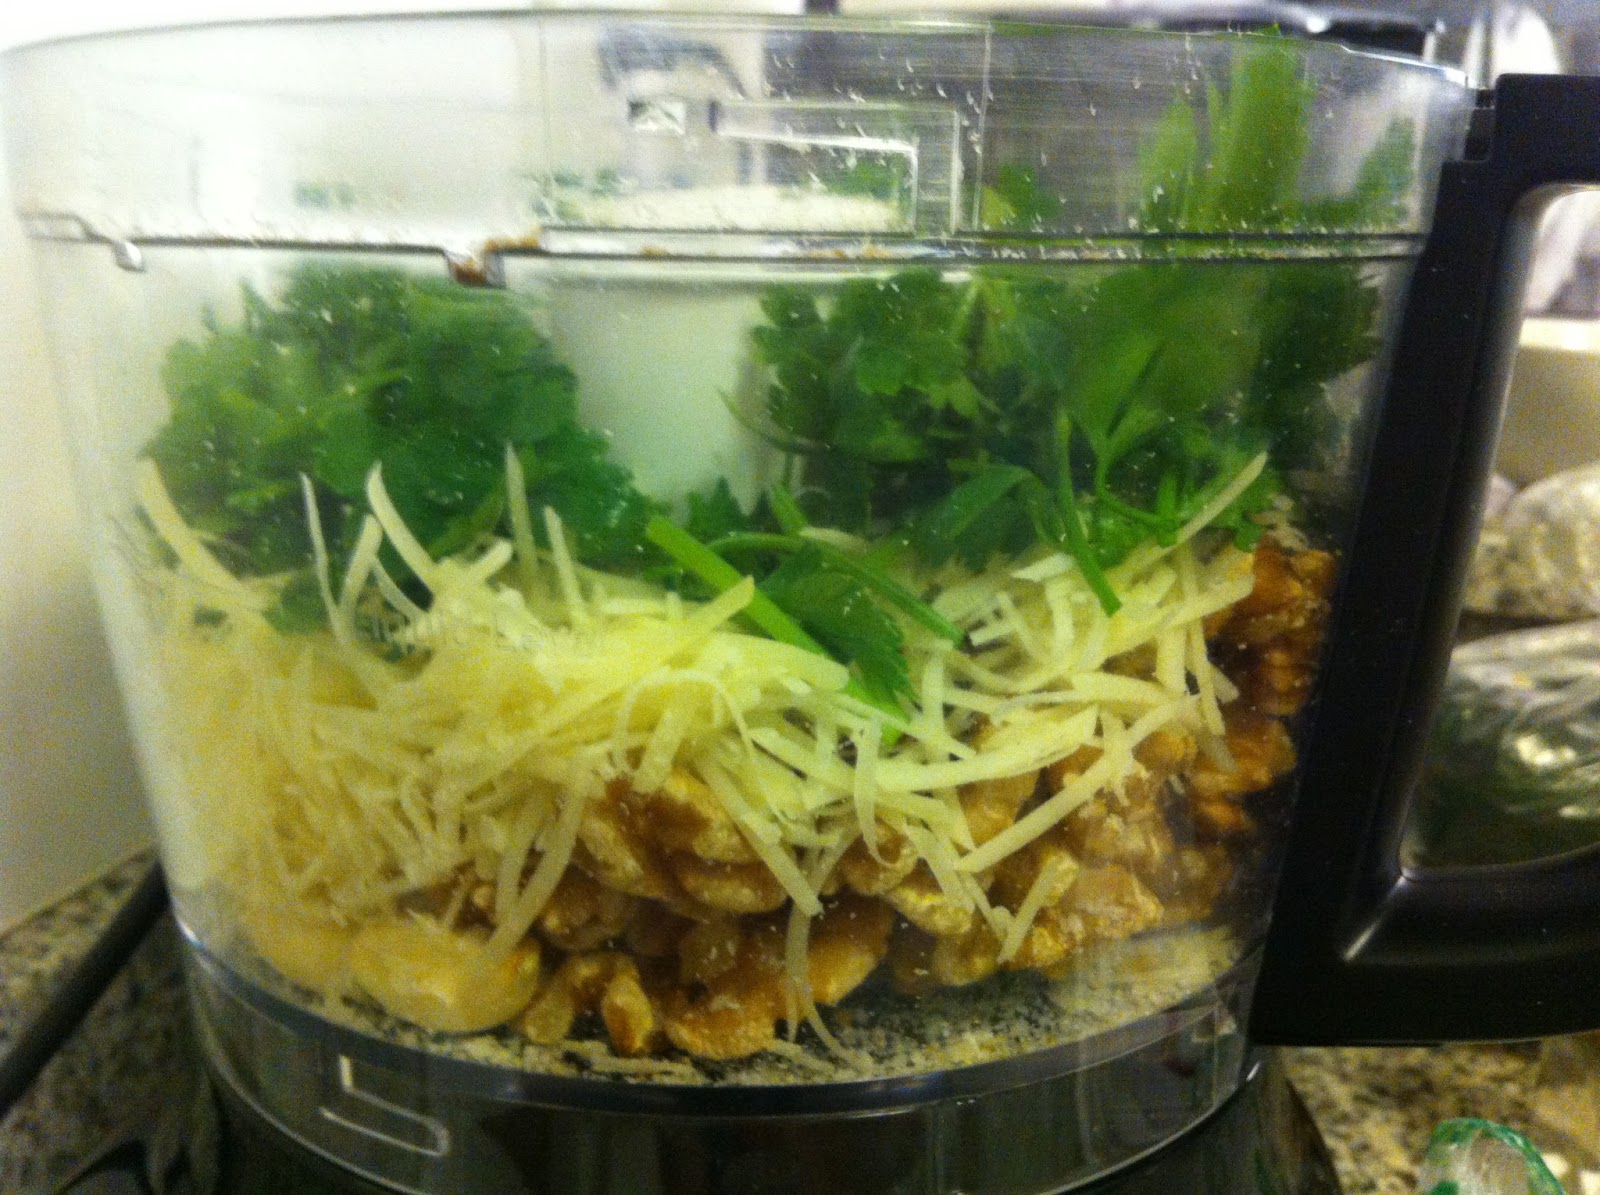
Any green herb like basil or parsley for freshness
Eggs
Onions (any)
Parmesan cheese
Mushrooms

Being broke soon-to-be-graduates, we decided to skip tomatoes, though I would absolutely do some sliced cherry tomatoes if I did this again. She had frozen Italian meatballs in the freezer, so we decided to use those up, too. However, next time I make these I'm totally going to my local meat shop to get some handmade spicy Italian sausage. Yum!


39th & 9th


The actual making of these bowls takes a little bit of forethought, which naturally we thought about right before making. Recommended order is below:
  1. Preheat your oven to 350° before you start.  
  2. Cook up your onions, mushrooms, and meat (together in a pan is fine). Leave the mushrooms meat just cooked through so that they won't overcook in the oven.
  3. Slice the tops off your bread bowls about 3/4 of the way up, then carve out with a spoon. The spare bread could make good croutons or be used in a bread pudding. Just don't carve too much bread, otherwise you won't have much to absorb the amazing mix of juices that will come out when baking.
  4. Spread olive oil, salt, and pepper around the inside of the bread bowl.
  5.  Assemble your bread bowl as a mix, not as layers. You don't want all the meat at the bottom, or all the onions at the top. Similarly, sprinkle cheese throughout.
  6. Finish with a raw egg--it'll bake in the oven. Put it on top so that you can watch it to avoid overcooking.
  

Excavated bread


 This is generally how your bowl should look once it's assembled and ready for baking:


Then bake for 15-20 minutes, or until the egg is set up and your cheese has melted. As mentioned above, if you want to speed the prep, cook your onions, mushrooms, and meat the night before. That way, you can just assemble in the morning.
Et voilà! You have a tasty, tasty breakfast bread bowl! When we ate it, not only were we in food comas immediately after, but we at some point stopped eating the fillings and just started tearing into the bread bowl that had been soaked with all the delicious flavors of our fillings. Mmm-mmm-mmm. Happy eating!

 
Ambiguously artisanal, definitely delicious

Friday, June 14, 2013

Bucking Convention: Pesto


HAI EVERYONE HAI HAI HAI!

Today I'd like to talk about a food (perhaps more accurately a condiment?) known as pesto. It's an extremely polarizing, if innocuous, little green sauce that people seem to either love or hate. And when people hate it and I try to proclaim its virtues, they always give me this look:


"Ain't no such thing as good pesto."


Well, STANLEY, maybe you've never had good pesto, but I challenge you to try just one more! It's not your usual pesto because it's missing one key ingredient! Aren't you curious about what that is?


"..."

I guess not, because you're Stanley. But please, please just hear me out! This pesto doesn't have any BASIL and goes easy on the oil!


"...huh."

Do I have your attention yet? This pesto substitutes basil with Italian flat leaf parsley and adds oil as-needed! It gives it a strong flavor and lightens it up a lot, which are my two main complaints with pesto: first, it's often bland, second, it's usually just a little basil in a swimming pool of oil. Gross. 

Basil-lovers fear not--I'm not decrying basil as pesto. This version though will please everyone, and it's more cost effective too since it calls for walnuts, not pine nuts, to give it body and balance the parsley. The original recipe did call to toast the walnuts, but I think it hardly makes a difference! 

Parsley Parmesan Pesto

Ingredients:

2 cups very tightly packed leaves of Italian flat leaf parsley
3/4 cups chopped walnuts
1/2-3/4 cups grated Parmesan cheese
3-4 large cloves of garlic (to taste)
1/2 tsp salt
3 tbsp lemon juice
1/2 cup of oil, adding more as needed

Put all ingredients except the oil in a food processor with a metal blade and pulse until combined, then add oil in a slow stream. Once combined, dip your spoon in for taste and consistency. Add more oil as needed, balancing with lemon and salt. Serve right away or freeze for up to 3 months. Delicious.


Before oil


After oil and processing. Yes, I love garlic.


What can you make with this yummy, scrumptious, lovely pesto? Here are a couple of ideas:


Shrimp, bell pepper, red onion, pesto pizza (crust from Trader Joe's for $1--about 4-5x what you see here)


Pesto Parmesan bowtie pasta. Mmmm, paaasta.

Unfortunately, I don't have the picture of the pasta I made on New Year's, which included turkey pesto meatballs, but en bref: mix pesto into raw turkey meat, add salt, and mix together with spatula and bake in the oven at 400 degrees for 20 min).

If you give this pesto a try, let me know what you think of it versus regular pesto. I have never tried to make my own basil-based pesto, but I will say that for flavor and consistency I love Classico's pesto:


Classico Traditional Basil Pesto
Surprisingly, made by Heinz.


That's all for now folks. Hopefully I've given you some incentive to try a new form of pesto. Hopefully with Stanley, who is now headed straight home to make this pesto. Happy eating!


Yee-haw.

Wednesday, June 12, 2013

Will the real spaghetti please stand up (please stand up)?

In the historic words of thought leader Eminem, "I'm BACK na-na-na-na-na-na-NA!"


"Did you miss me? Huh? Huh? HUH?!"


In the months since I last posted, I've celebrated my paper anniversary with New York City, moved apartments, shuffled roommates, been promoted, echoed as a new class graduated from Harvard, visited old friends, made new old friends, redefined my personal relationships, flown home at last, and overhauled my life. Throughout it all, I've cooked, eaten, drank, and lived. I want to share with you a little taste of what I've learned and how it flavors where I'm going.

I've certainly missed blogging, or sharing the food I love to cook with anyone who loves to eat. I've learned some new things since I've been away, and I hope to use them to tempt, beguile, entice, and inspire you to take them as yours and own your kitchen! Or at the very least, a mean enchilada.

What have I been up to--what's in store for you? Well, scroll on down and get excited for the good things to come!

Ok, please don't get this excited. Seriously, I can see you drooling from here.


A sneak peak of the eating which lies ahead:


That was just a small preview. Okay, yep, go ahead now:

EAT ALL THE THINGS!!!!


No judgment this time--I promise! Stay tuned for regular meals and more oddball humor. Happy eating!

Saturday, November 3, 2012

What to Eat When You Can't Eat Anything

As some of you know, I had my wisdom teeth pulled this weekend. Originally scheduled for Tuesday, the day Sandy swept into town, it was postponed until Friday.

Turns out Vicodin and I are in no way compatible, but I'm getting pretty good at ice packs and sleeping on my back. The thing I'm mostly complaining about, to no end, is not being able to eat. I love to eat. I live to eat. Really, I do. Little makes me happier than sinking my teeth into a burger and fries, slurping my mom's spaghetti, reveling in my dad's smothered pork chops, gobbling up sushi rolls, nomming on naan and curry, or popping popcorn shrimp into my mouth, even chowing down on a Taco Bell Chicken Crunchwrap Supreme!...you get the picture.

So, I'm two days in and really struggling to eat soup, soup, and all things slurpable. Because my mouth is swollen in a weird way I really can't chew without biting myself, I'm struggling not to get bored. In an effort to entertain myself, and you, here are some of the things I've been eating!

1. Yogurt, vanilla
2. Chicken stock, microwaved
3. Black bean soup puree
4. Carrot and ginger soup
5. Butternut squash soup puree
6. Green smoothie Odwalla-esque thing
7. Vanilla icing -- I'm not kidding, just icing by itself...I know, judge me why don't you?!
8. Vanilla ice cream
9. Carnation milk breakfast shakes, French Vanilla flavor
10. Hummus, also by itself
11. Guacamole (but only a little, I'm saving it for the refried beans that will be my lunch tomorrow)
12. Cremita de arroz (Cream of rice)

There was the early, abortive attempt to eat a cheese stick because I succumbed to desperation too early. Yeah, I'm not cut out to be a beaver and chew only with my front teeth.

The best things thus far have been yogurt, the black bean soup puree because it's spicy, the green smoothie because I eat that normally, the breakfast shakes (a surprise winner!), and guacamole (because it's the most flavorful thing I've eaten in two days). The worst thing were soups #4 and #5--not my favorite vegetables to begin with. Cremita de arroz was decent, but considering my mom used to make it for me when I was little, there is just no matching those childhood memories.

Anyway, if you ever find yourself in a situation where you physically can't chew or really open your mouth, try eating some of these things. You'll find yourself requiring nourishment every 2-3 hours, which is quite difficult, but hey, you'll become a connoisseur of soupy sustenance.

I can't wait to catalog my post-op binge. Get ready for burgers, pasta, ribs, taco bell, fried chicken, and who knows what else! I'm taking suggestions!

Happy eating! 

Monday, October 8, 2012

Fish 'n Potatoes

Hi y'all! As I mentioned in my last post, I could easily be a pescatarian. Well, after saying that I realized that I had no actual fish recipes up on this blog and that I had this meal waiting in the wings. 

It's definitely more traditionally American (or what I perceive to be American!) than what I normally get my eat on with, but it was definitely satisfying. So, without any further ado, here's....

 Scallion-Crusted Scrod with Accordion Potatoes

1 lb scrod* fillets, deboned
3-5 scallions, chopped fine
1-1.5 cup Japanese breadcrumbs or Panko
Lemon, 1 tsp. zest and 1 tbsp. juice
2-3 oz. baby spinach
Olive oil
2 cloves of garlic, minced
Salt
Pepper

*Scrod is baby cod, and since cod is a flaky, dense white fish without a lot of unique flavor, any ol' white fish will do.


Preheat your oven to 375, then dice up your scallions and mince your garlic. Zest your lemon, and then mix these ingredients in with your breadcrumbs. The quantity of breadcrumbs depends on how large your fillets are. Sauté the breadcrumbs, scallions, and garlic all together for ~3 minutes or until breadcrumbs turn golden brown. Take care not to burn them! 


Next you can prep your potatoes. Slice them almost all the way through, ideally 1/8th of an inch apart. I was in a hurry, so as you can see my knife work is pretty ugly. But, I wasn't cooking to impress anyone other than my own stomach, which really doesn't care what food looks like. I will note, however, that the potato will be ready more quickly if the slices are narrower.

Once you've got your incisions, drizzle the potato liberally with ~2 tbsp olive oil and as much salt and pepper as you want. I've put the scallion stems here to try to add a little onion flavor to the potato, which might have worked a little. I'm being honest here, I didn't notice much difference but it made me feel cool and experimental, hahah.


Next, dip your fish in a little olive oil or egg white and cover it in as much breading as will stick.  Place it on a greased baking pan, preferably lined in tin foil to speed up clean up.


Cook for 15-20 minutes, or until the fish flakes easily with a fork. Throw a bed of spinach down on the plate, reuse that zested lemon for lemon juice to top the fish and dress the spinach, and voila! Your very own fish 'n potatoes meal:


Pair with whatever beverage you'd prefer, but may I suggest Joel Gott sauvignon blanc? For $14.99 a bottle, it's delicious, crisp, and very tasty. Even better, it comes with a screw top so you can save it for another day if you don't drink it all in one sitting...


 Happy eating, so long, and thanks for all the fish!

Monday, October 1, 2012

Shrimp 2 Ways

As the old saying goes...double the shrimp, double the fun!

While that may not be the saying, it's definitely true in my case. I love shrimp. I could seriously be a pescatarian and give up meat if I could have seafood every single day. And that's saying a lot, because I love meat. Maybe it's the Caribbean in me, but seafood just does something special for me.

To keep my diet varied while living on my own in the real world, I like to get frozen, pre-shelled shrimp from Trader Joe's that I can just cook up in a jiffy whenever I want. It doesn't really matter if they are pre-cooked or not since shrimp take so little time to cook.

Now, some people may be sticklers for shrimp with the shells on, and I do understand that. I even made my own shrimp stock at the beginning of the summer under the influence of Chef John Besh's cookbook My New Orleans, which is truly impressive and convinces you that the only way to cook is to spend hours slaving away over a hot stove and make everything from scratch. Oh, and raise a farm in your backyard. Suffice it to say, I never used that stock after I made it and it sat in my freezer for a month. So the net of that experience is that I now simply buy pre-shelled shrimp!

So, on to what I made:


Creamy Cajun Shrimp Linguine...found it on Pinterest!


Celery Shrimp Sauté with Guacamole Toast


So, how to make it? Here we go:

Creamy Cajun Shrimp Linguini
Original recipe found here


1 cup water
1 (14-ounce) can fat-free, less-sodium chicken broth
6 ounces uncooked linguine (I just substituted pasta)
1 pound medium shrimp, peeled and deveined
1 1/2 tablespoons butter
1 (8-ounce) package presliced mushrooms*
1 large red bell pepper, cut into (1/4-inch-thick) slices
2 teaspoons all-purpose flour
1 teaspoon salt free Cajun seasoning (I found mine in the bulk spices at my local supermarket)**
1/4 teaspoon salt
2/3 cup fat free half-and-half
1/4 cup chopped fresh flat-leaf parsley
Parmesan cheese (my addition)


*Didn't have any mushrooms
**The Cajun spices here must be different, because this came out kind of sweet. I compensated by adding Adobo...awww yeah. 

So from that point on I basically followed the steps of the recipe, which are below:

Combine 1 cup water and broth in a large pot and bring to a boil. Break pasta in half; add to pot. Bring mixture to a boil. Cover, reduce heat, and simmer for 8 minutes. Add shrimp to pasta. Cover and simmer for 3 minutes or until shrimp are done; drain and set aside. Melt butter in a large skillet over medium-high heat. Add mushrooms and red pepper to pan; sauté 4 minutes or until moisture evaporates. Add flour, Cajun seasoning, and salt to pan; sauté 30 seconds. Stir in half-and-half; cook 1 minute or until thick, stirring constantly. Remove from heat. Add pasta mixture and parsley to pan; toss together with tongs. Add Parmesan cheese!
My main piece of advice for this is to prep (wash, cut, etc.) all the ingredients beforehand because this recipe moves along at a quick clip! Also, as the original recipe notes, the pasta is much better cooked in broth because it absorbs that flavor. I wasn't able to do it because I had leftover plain spaghetti, but I want to try it again. On to recipe number two!
This recipe is something I threw together off-the-cuff, but more or less this is what went down:
Celery Shrimp Sauté with Guacamole Toast
Shrimp, as much as you think you'll eat
1 tbsp. olive oil
Celery, 1 stalk per serving
1/2 a yellow onion
Red pepper flakes
Whole wheat baguette slice, halved
Salt and pepper, to taste
Guacamole
Wash the celery, then halve it lengthwise and chop it; dice up the onion and set aside. Slice the bread in half, toast it, and set it aside. (You can always warm it up later and there's nothing worse than waiting for your bread to toast as your hot food gets cool.) Heat the oil in a frying pan on medium high heat and put the celery and onions in at the same time. Normally I wouldn't advocate that for veggies, but celery is high in fiber and takes a while to cook through, so it's okay to put it in with onions. Be sure to stir periodically to make sure the onions don't burn. At this point, add in red pepper flakes so that they have started releasing their heat before you add the shrimp. Next step is--you guessed it--add the shrimp! Cook for 3-5 minutes, until pink and no longer grey. Add the salt and pepper before you finish the shrimp. Finally, reheat the bread if necessary, slap some guac on there, and eat! Eat, eat, eat!
See, double the shrimp equals double the fun! And definitely double the noms!
Happy eating!

Back in Blog! With Flatbreads...

HELLO! I have been absent. I know! I know, I missed you too. I brought you a present:

I ate both of these in one sitting, alternating between each because they were THAT GOOD.


I figured I'd start off with something easy and cheesy, since I'm easing myself back into being a responsible food lust-provider.

A few months ago I made these on the spur of the moment after deciding I wanted pizza and I wanted it my way (Burger King doesn't make pizza, as far as I know). Having only bread, I decided to make flatbreads instead. I'll start with the top pizza:

Spinach and Mozzarella Marinara Flatbread

Preheat oven to 400 degrees
Rustic Italian or French bread (I like Whole Foods' pain de campagne), toasted
Spinach, as much as you want
Marinara (I made mine but from a jar is just fine)
Sliced mozzarella

The second edible is a...

 Mushroom and Green Olive Pesto Flatbread

Preheat oven to 400 degrees
2 portabello mushrooms
Rustic Italian or French bread (I like Whole Foods' pain de campagne), toasted
Sliced mozzarella
Green olives stuffed with garlic
Trader Joe's pesto (amazing!)

For each flatbread, I recommend toasting the bread first until it's pretty dark so that it won't buckle and become soggy under the weight of all the sauces and moisture (cheese and mushrooms both release moisture when melted). I also recommend making the marinara a little spicy to balance your generous portions of mozzarella, and even adding some meat into the sauce. Really, you can put anything you want on bread with cheese, it's up to you!
The garlic-stuffed green olives came from my local grocery store. After you toast the bread, just load up each piece with what you want and pop it in the oven for 15-20 minutes, or until the cheese has melted. Don't panic if your cheese doesn't melt right away because mozzarella has a higher melting temperature than something like cheddar. When done, consume immediately!
Returning to the TJ's pesto, briefly. I am a pretty harsh judge of pesto, namely because I was subjected to sub par, greasy, gross pesto for 4 years (here's to you, Harvard). Trader Joe's pesto is well-balanced and flavorful. You can taste the basil AND the garlic, without being overpowered. The oil is perfectly proportioned to the pesto, and if it separates it stirs back together quickly without making me feel queasy about how much oil I'm about to consume. It's also refrigerated and must be refrigerated even before opening, so you know it's fairly fresh. I'm sure Whole Foods' pesto is comparable if there isn't a TJ's near you.
So that's that, happy eating! And look forward to more posts soon =).